
Power Apps Portals (formerly Dynamics 365 Portals) are websites you can create that allow you to share, collaborate and present information from your Microsoft Dynamics 365 (D365) environment with your internal team, customers, or partners.
Why should you set up your portal? It allows you to emphasize and share information pertaining to your Dynamics 365 application. What’s even more of an incentive, it’s free. That’s right, it is included with your Customer Engagement subscription if you have a minimum of 10 Enterprise users. If you don’t meet that requirement, purchasing a portal environment is available for a monthly fee.
Enhance your team, customer, or partner engagement
A Power Apps Portal allows you to showcase any information you want from the application. There are many use cases for the portal.
Collaborate with your internal team. Use your portal to share and collaborate knowledge. The environment allows you to submit, review, and update internal cases – all in one place. In addition, you can share the information with all of your employees, even if they don’t have a Dynamics 365 license.
Create a forum for your customers. In addition to submitting a case, share knowledge for known issues and provide customers with a search option for frequently asked questions. Establish a community forum where customers can share best practices, get feedback, and connect with each other.
Connect with partners. When two companies go into an agreement, there are many discussions that occur as the relationship develops and grows. Keep your stakeholders from both organizations updated on collaborative events or projects with up-to-the-minute updates. Opportunities can be worked in real-time, and important information is distributed to everyone. Both parties can update contact information to key prospects and accounts.
Reduce cost and increase productivity
Consider your current business processes:
How does your team enter external or internal support cases right now? Do they receive support requests by phone or emails and manually enter information into Dynamics 365?
How many D365 licenses do you currently pay for? Does everyone on your team access D365 daily and enter or modify information to justify the monthly cost of a license?
If you have partners, how is that relationship – could a portal help close sales faster or more easily share information?
If you can identify with any of these scenarios you could reduce cost by removing licenses while enhancing team, customer or partners communication and processes through a self-service portal.
What kinds of portals can you create?
D365 allows you to select from a few portal templates:
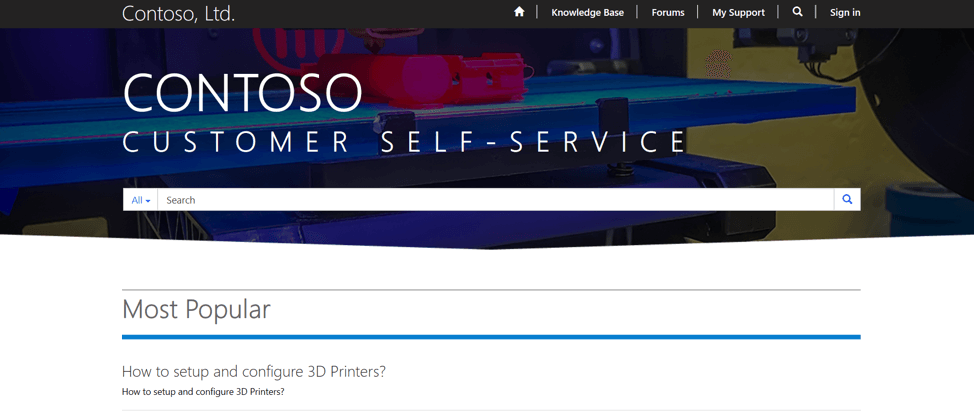
- Customer Self-Service
- Customer Portal
- Partner Portal
- Partner Project Service (requires Project Service Automation add-on)
- Partner Field Service (requires Field Service add-on)
- Community
- Employee Self-Service
Learn how to provision your Power Apps Portal
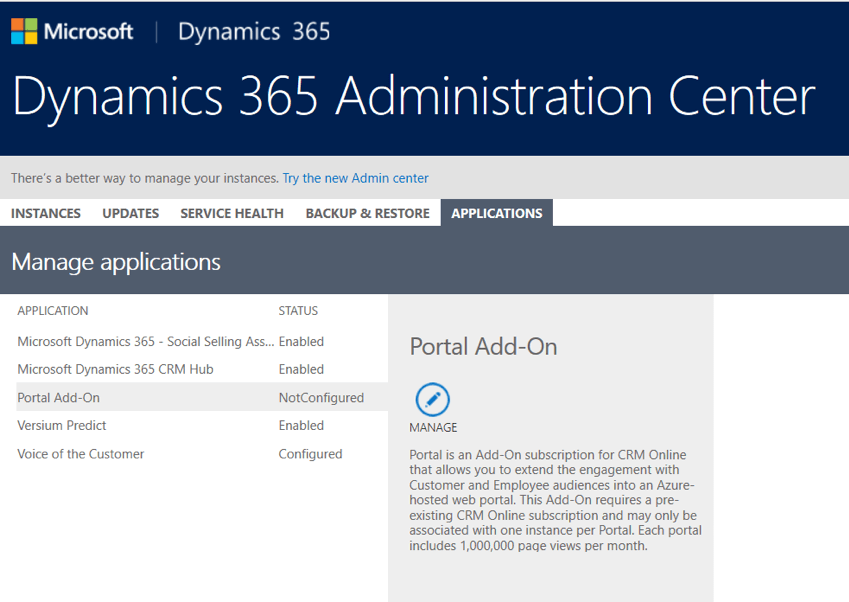
- Navigate to your Dynamics 365 Administration Center
- Select the Applications tab
- Navigate to the Portal Add-On application – select Manage
- Begin to set up your Portal Details
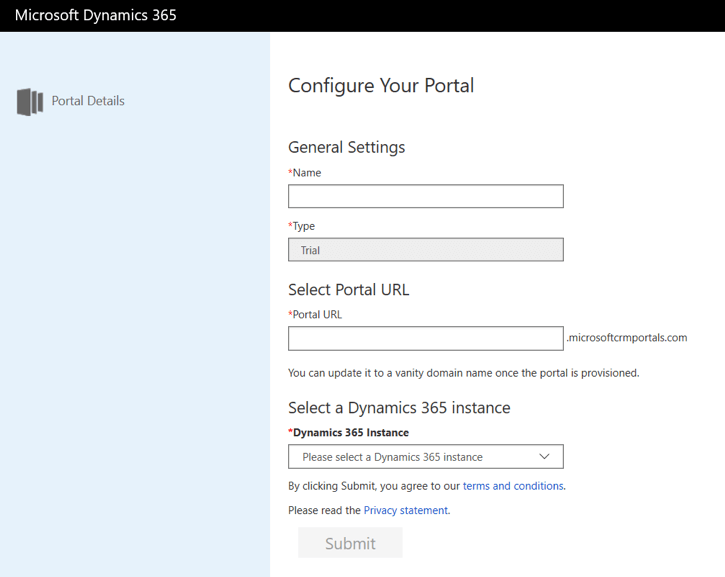
- Portal Name: This field will be used to identify what your portal is for (particularly helpful if you have multiple ones), and it can be modified later
- Type: The type field represents your type of subscription – Trial or Production (this is set by the system depending on if your portal is a trail or paid subscription)
- Note: When you set up a portal within a production subscription you will see another field called “Portal Development Status” where you can further identify your portal:
- Prototype
- Development
- Test
- UAT
- Live
- Note: When you set up a portal within a production subscription you will see another field called “Portal Development Status” where you can further identify your portal:
- Portal URL: Set your subdomain here, and once the portal is provisioned, you can come back and add a fully configured domain by uploading a new or existing SSL Certificate
- Dynamics 365 Instance: Identify the D365 environment your portal will be connected to
- Select Portal Language: Select your default language
- Select Portal Administrator: In this dropdown list, you can assign the user who will configure and maintain the portal (all D365 System Admins will show up in this list)
- Portal Audience: Select your target audience (aka portal users)
- Select Portal to be deployed: This is where you can choose the type of portal that is provisioned (based on the audience selection above)
- Select Submit and accept the Terms of Service – you are ready to go!
Your Power Apps Portal is now set up, take a look around and tailor it to your business needs.
For additional questions or assistance setting up your portal, contact us today.
By Brenda De La Torre, Solution Consultant at Arctic IT.