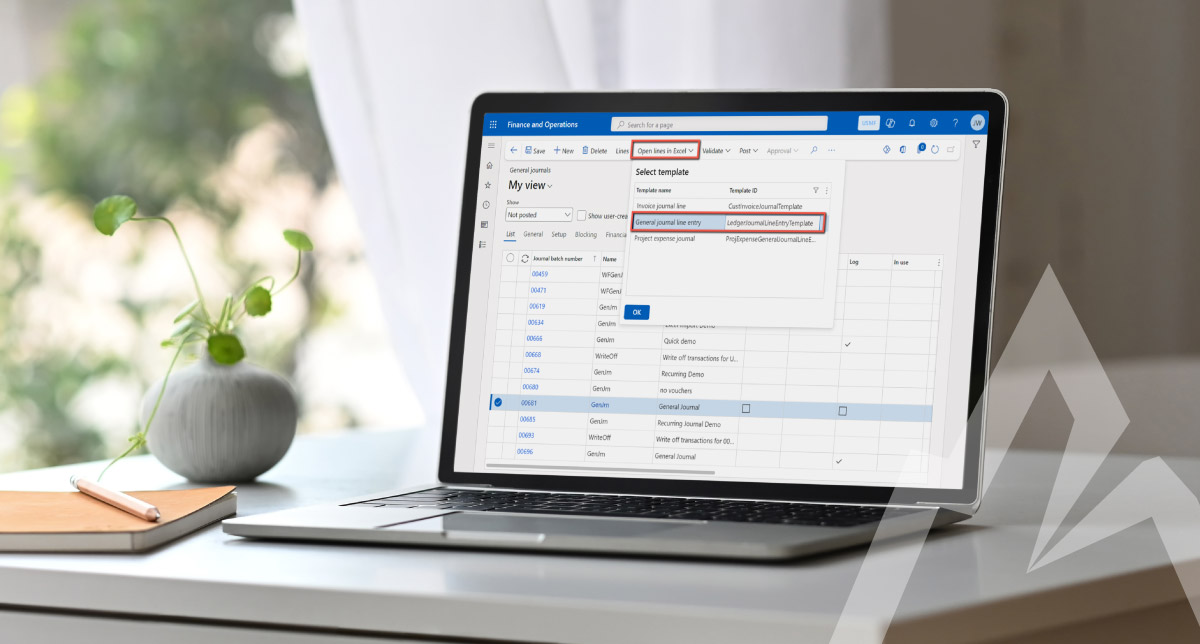
When utilizing the Open-in-Excel feature within Dynamics 365 Finance and Supply Chain Management, the user will automatically be presented with the default template columns for that data entity in Excel. When you desire to update columns that are not included in the default template, it is possible to add additional columns on-the-fly during the editing process.
NOTE: These new columns will be added only for that respective Open-in-Excel export instance. To permanently modify the default template so additional columns are included by default for all users, see the Default Template Customization section of this article.
Ad-Hoc Open-in-Excel Template Customization
To temporarily add or remove columns to the default template on-the-fly during a specific open/modify/publish-back session within the Excel Office Add-In feature, follow the steps below.
The following process is the same, regardless of what data the user has “Opened in Excel”. The steps below assume the user has already selected Open in Excel on the desired form within Dynamics. The format change(s) will only be effective during the Open-in-Excel session in which these steps are performed.
Let’s review two examples: a General Journal and the primary Vendors table.
General Journal Example
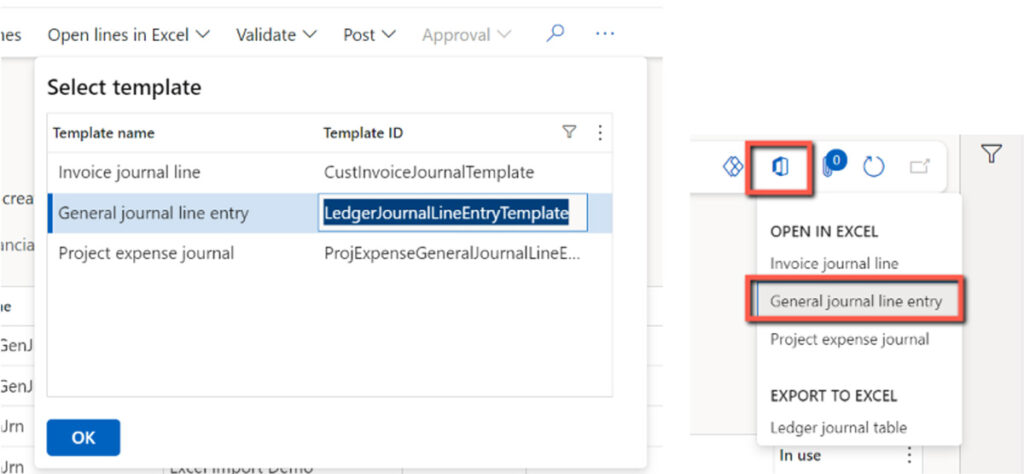
- Select the desired General Journal and click Open lines in Excel. Or, click the Open in Microsoft Office icon in Dynamics 365 and select the desired Open in Excel template.
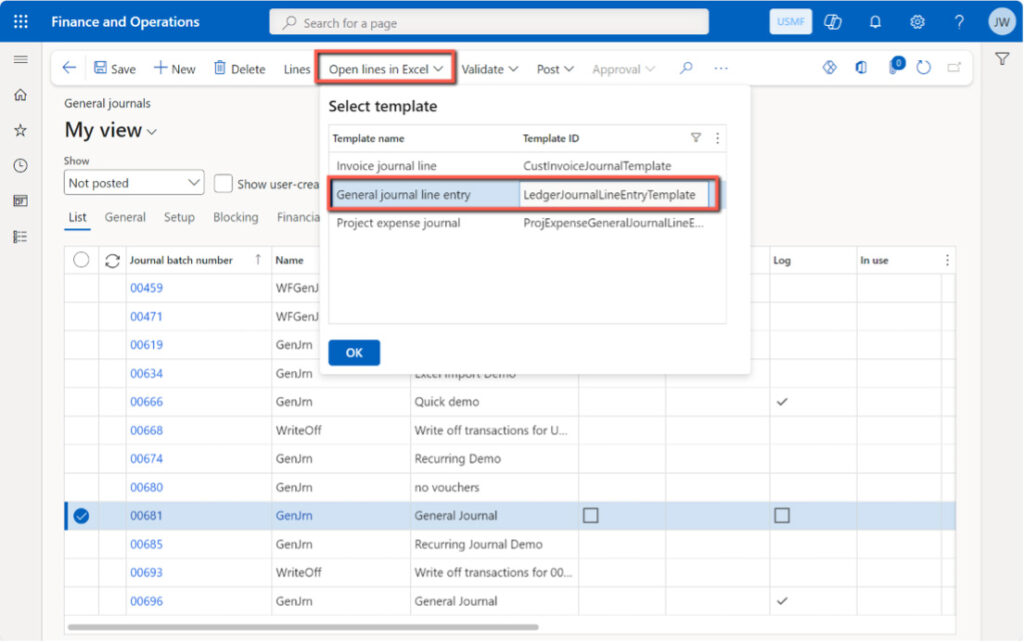
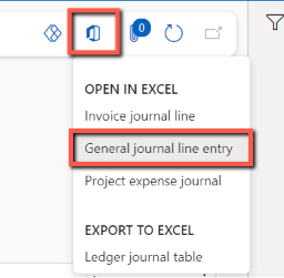
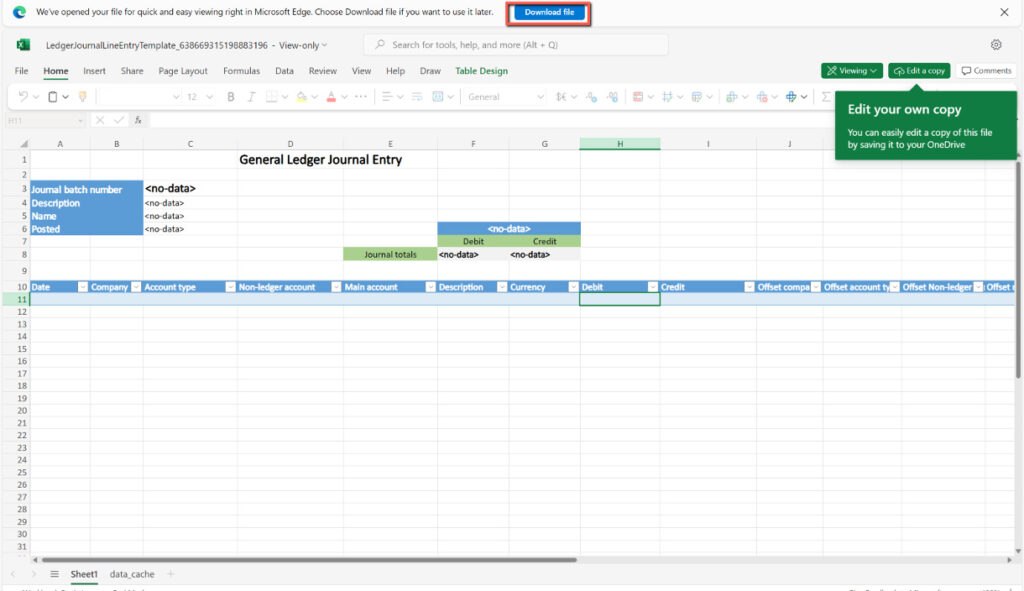
- If the Excel template opens in Excel in the web app (in a browser), click Download file. The Office Add-In function is not available in the web version. Open the downloaded file, which will most likely be located in your local Downloads folder.
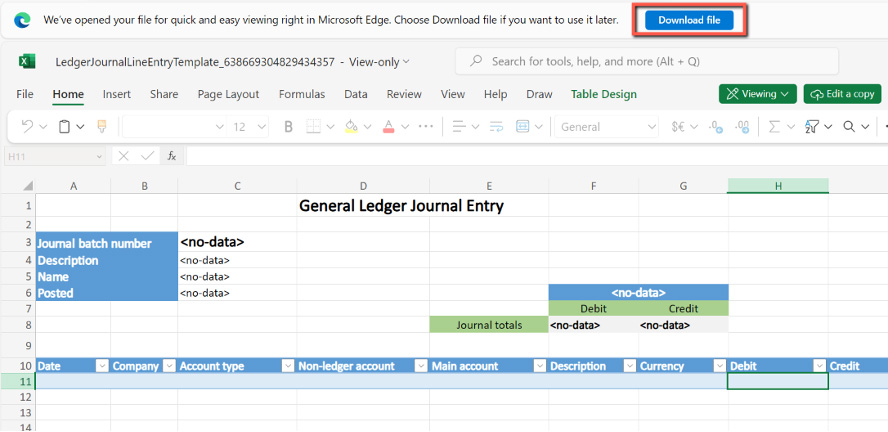
- Open the template in Excel, click allow editing, and log into the Excel Office Add-In if necessary.

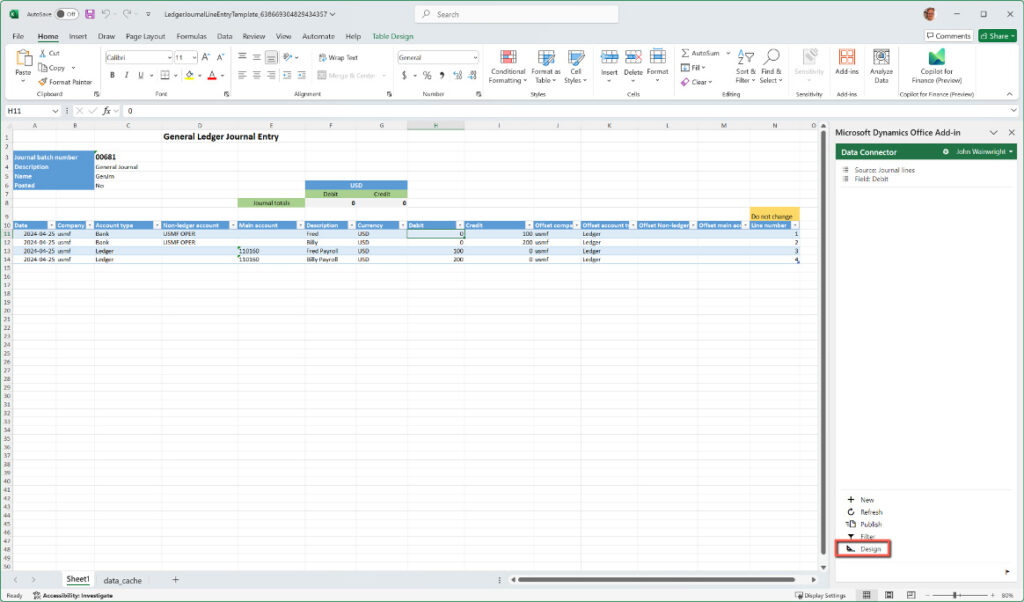
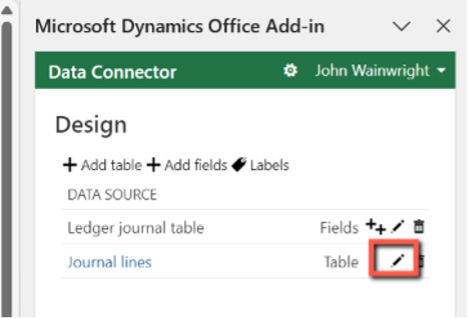
- Click the “pencil” icon next to the desired table from which you’d like to adjust related visible columns.
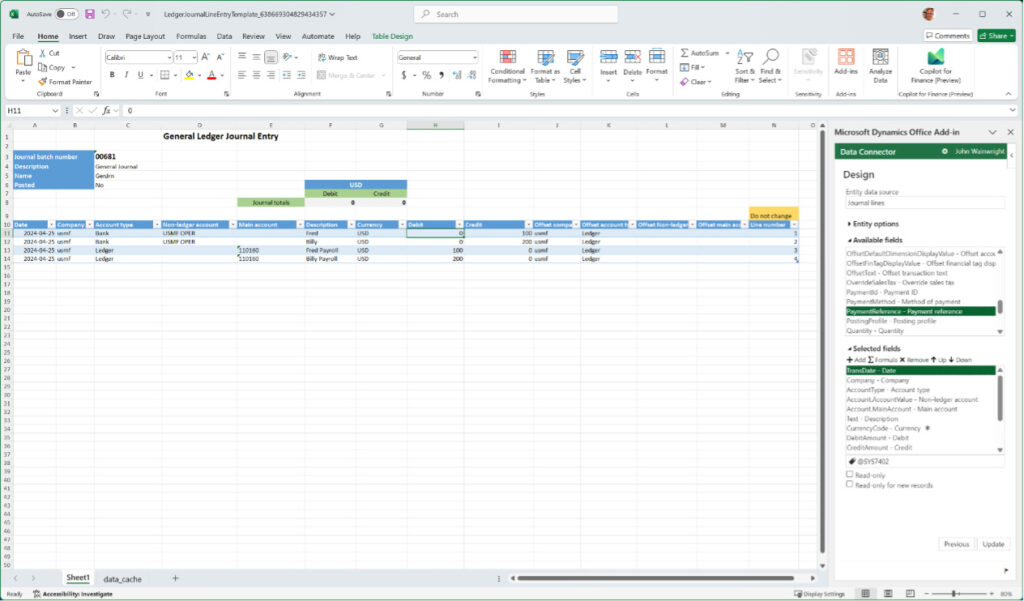
- To add a column, select the desired column from the Available fields section, and then click + Add under the Selected fields section. Conversely, to remove a column – select the desired column from the Selected fields section, and click X Remove. Use the Up/Down icons to modify the order (left/right) of the selected columns. When satisfied with any format changes, click Update.
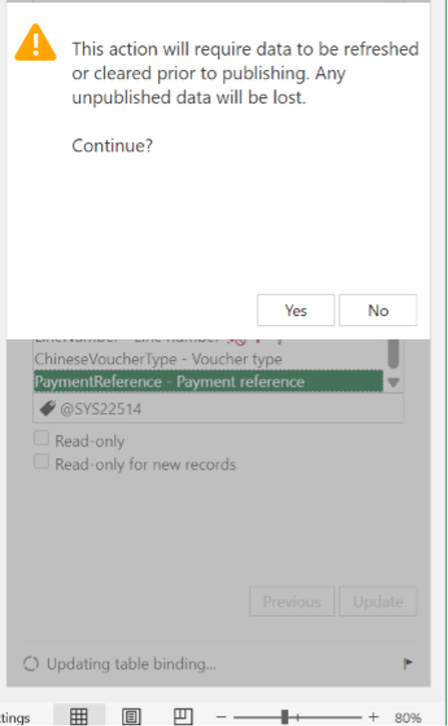
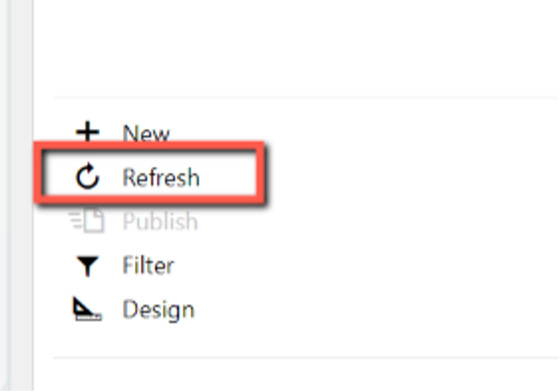
- Click Done, which will prompt for a second refresh. If it does not prompt for a second refresh, you should refresh manually.
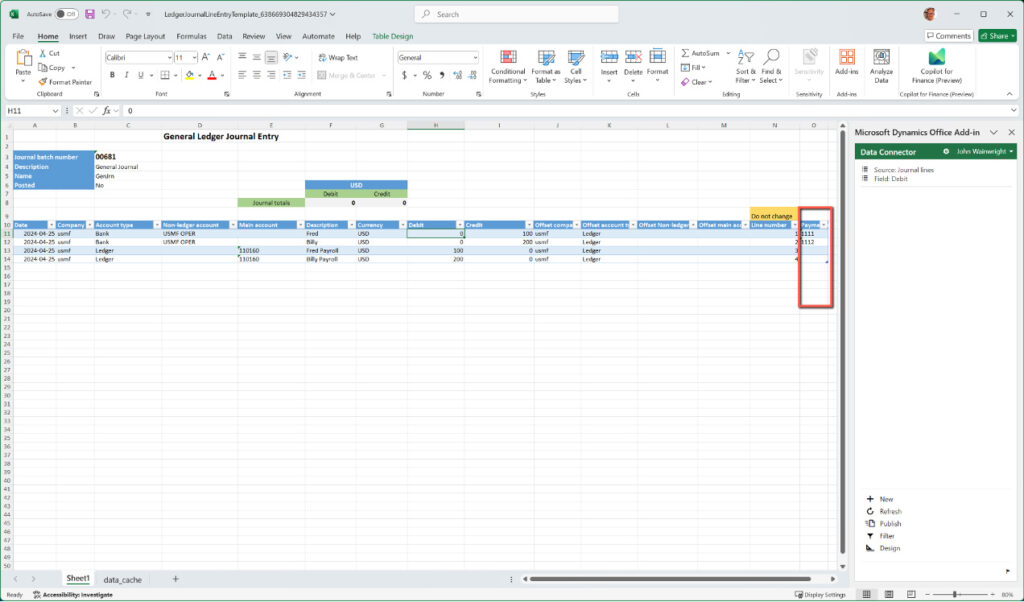
- The new column(s) are now added, and any changes in the data on those columns will be included when you subsequently click Publish.
Vendor Master Example
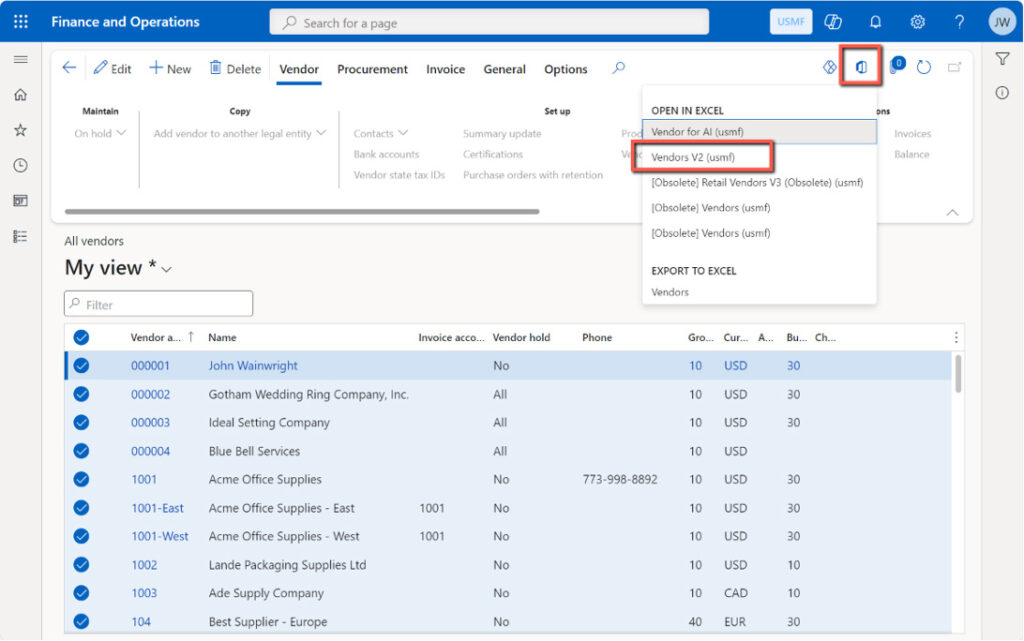
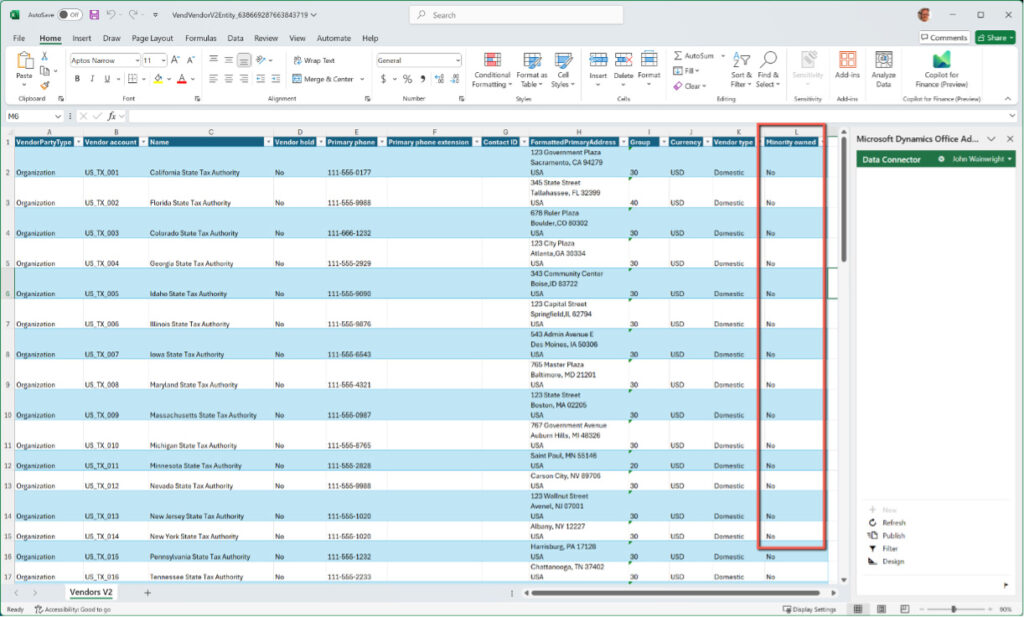
- Click the Open in Microsoft Office icon in Dynamics 365, and select the desired Open in Excel template. Choose Download in the flyout form.
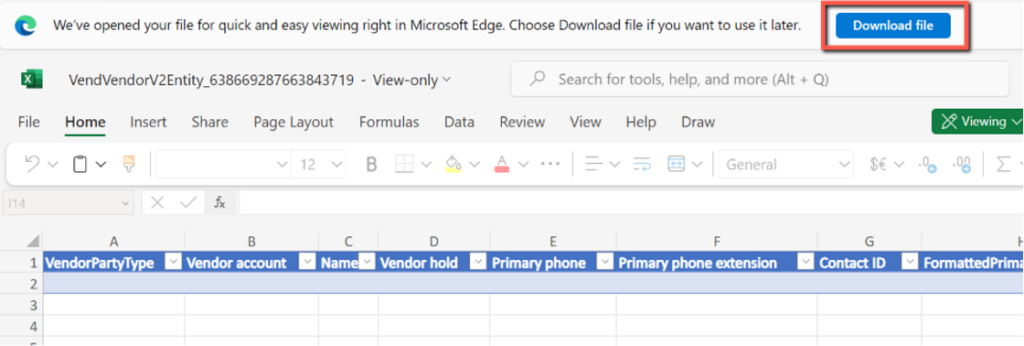
- Just like the previous example, if the Excel template opens in Excel in the web app (in a browser), click Download file. The Office Add-In function is not available in the web version. Open the downloaded file, which will most likely be located in your local Downloads folder.
- Open the template in Excel, click Enable Editing, and log into the Excel Office Add-In if necessary. Click Design.

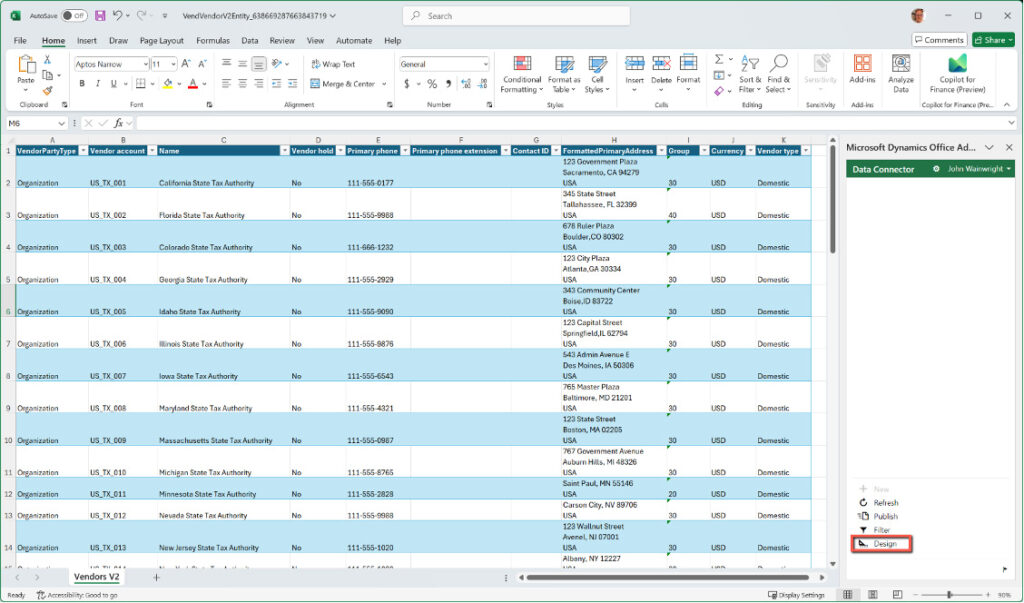
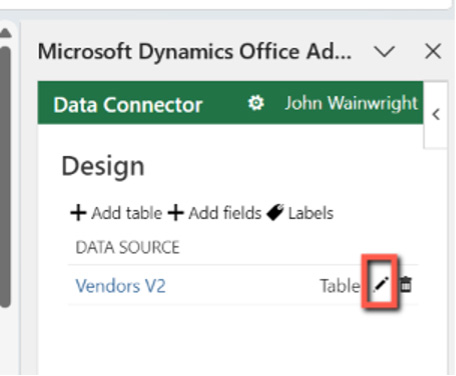
- Click the “pencil” icon next to the desired table from which you’d like to adjust related visible columns.
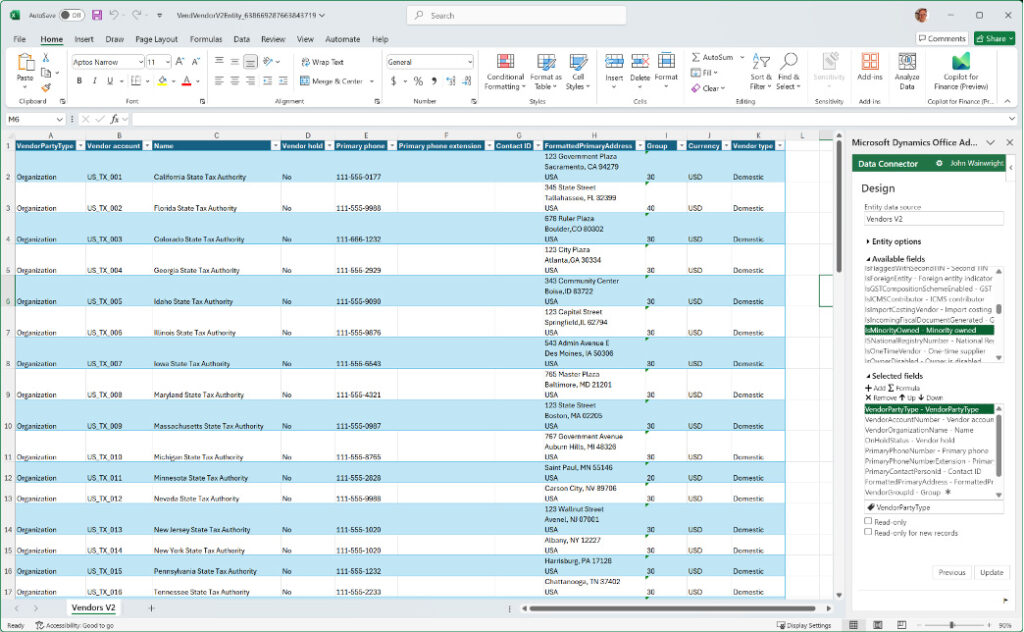
- To add a column, select the desired column from the Available fields section, and then click + Add under the Selected fields section. Conversely, to remove a column – select the desired column from the Selected fields section, and click X Remove. Use the Up/Down icons to modify the order (left/right) of the selected columns. When satisfied with any format changes, click Update.
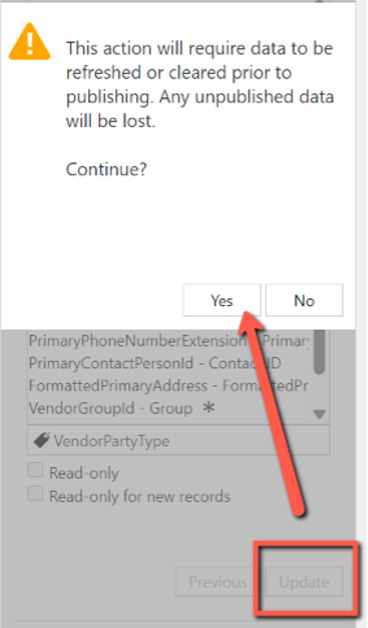
- Click Done, which will prompt for a second refresh. If it does not prompt for a second refresh, you should refresh manually.

- The new column(s) are now added, and any changes in the data on those columns will be included when you subsequently click Publish.
Default Template Customization
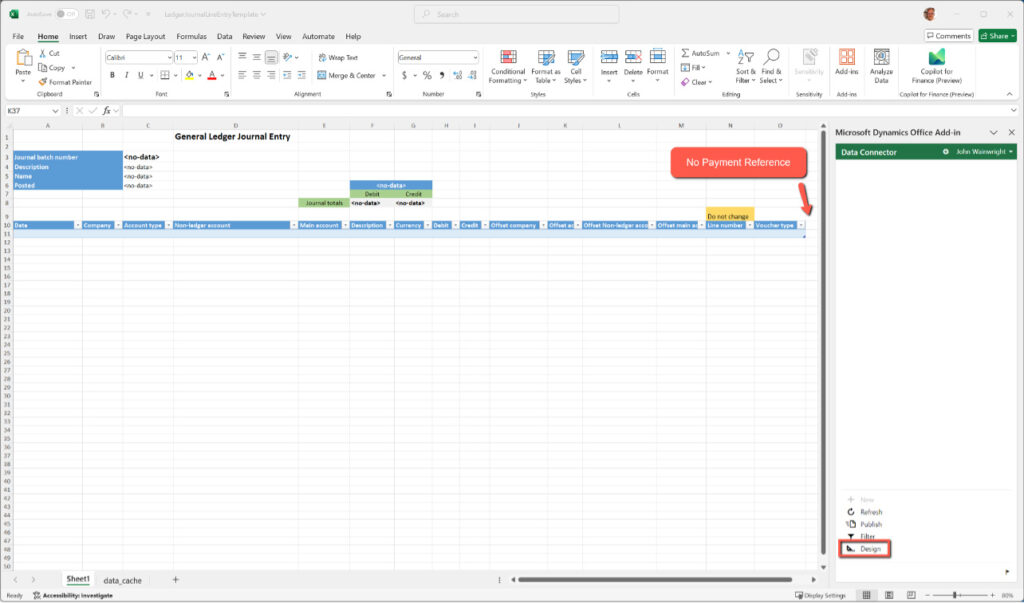
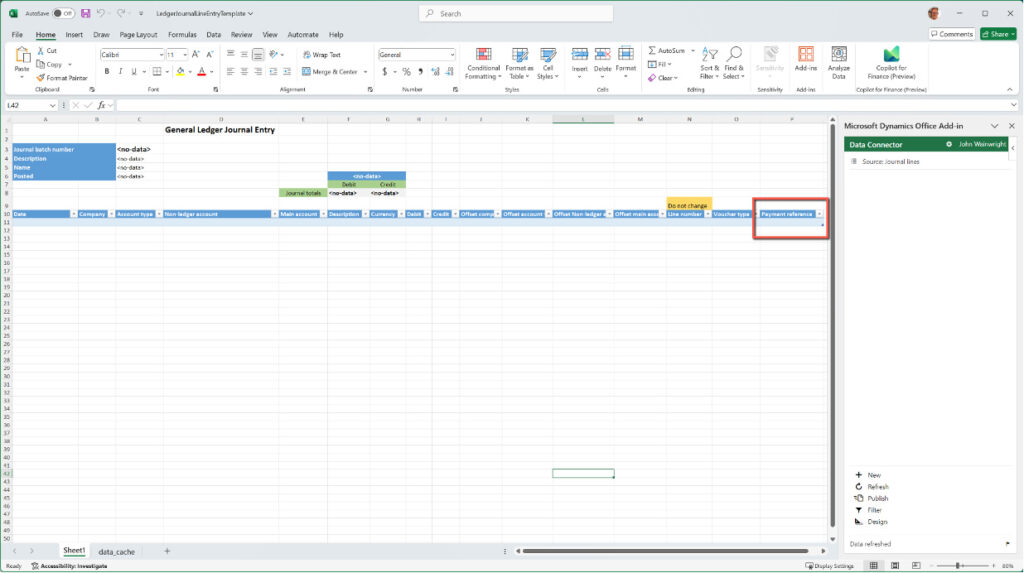
To permanently add or remove columns to the default Open-in-Excel template for ongoing use with the Excel Office Add-In, follow the steps below. In the following example, we will add “Payment Reference” as a permanent column to the default Open-in-Excel template for General Ledger Lines.
If you’re uncertain which template should be modified, Dynamics will display the Template ID when opening items in Excel.
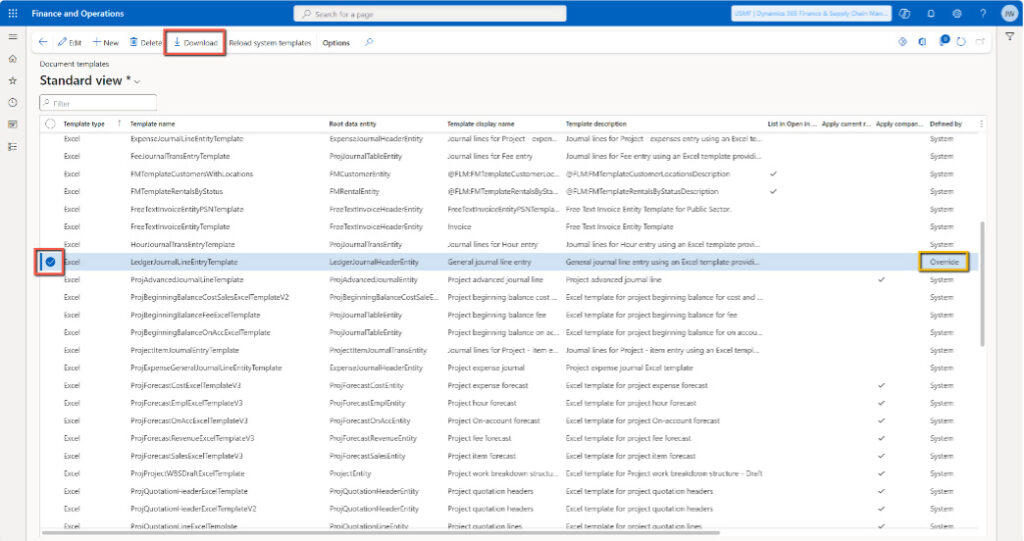
- Go to Common/Common/Office integration/Document templates and locate the desired template. If the Defined by value is System, then the template is currently the “default” format as provided by Microsoft. If the Defined by value is Override, then the template has been modified in the past. Select the desired template and click Download.
- As mentioned above, if the Excel template opens in Excel in the web app (in a browser), click Download file. The Office Add-In function is not available in the web version.
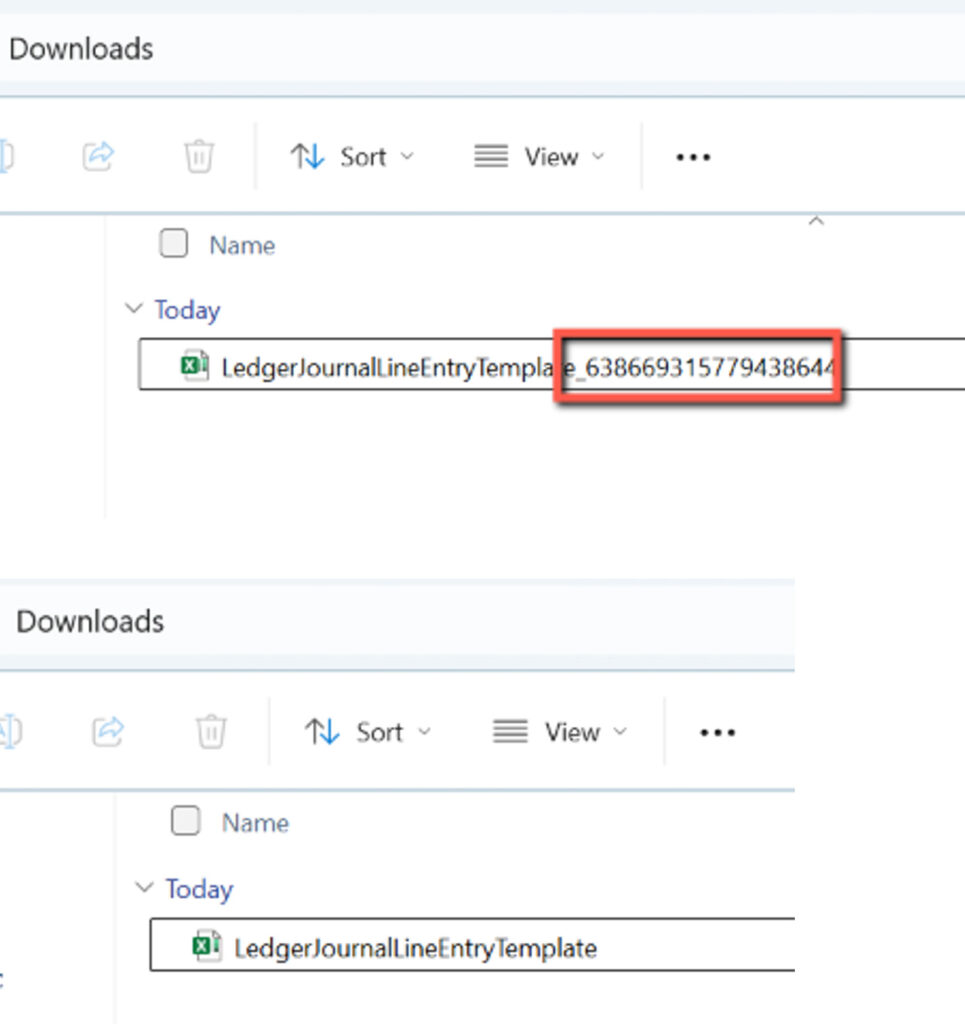
- Locate the downloaded file, which will most likely be located in your local Downloads folder. Prior to opening the file for editing, remove the appended underscore-and-session-number, so that the file name is just the template name.
- Open the template in Excel, click Enable Editing, and log into the Excel Office Add-In if necessary. Click Design.
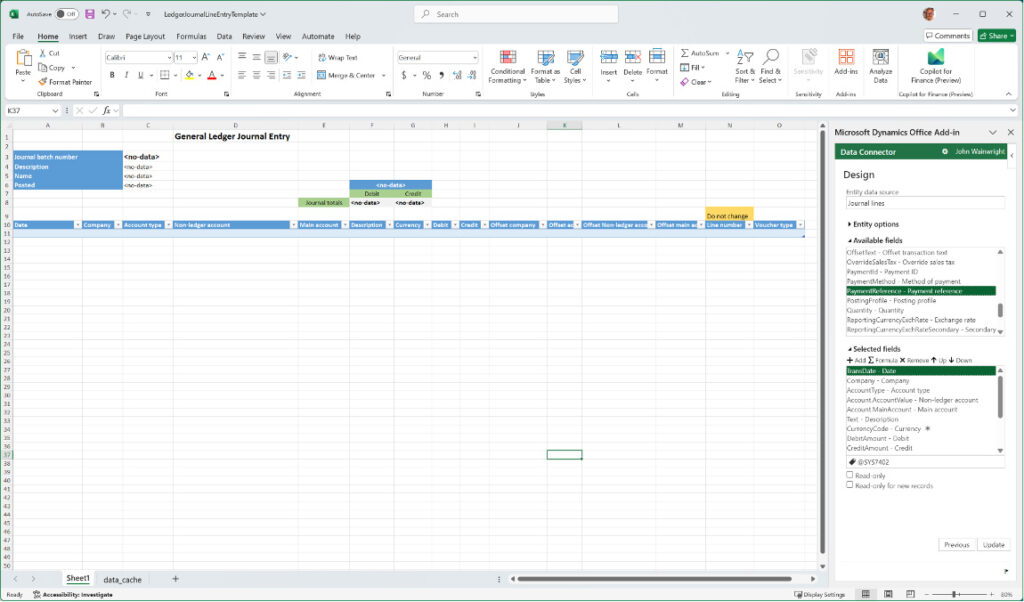
- Click the “pencil” icon next to the desired table from which you’d like to adjust related visible columns.

- To add a column, select the desired column from the Available fields section, and then click + Add under the Selected fields section. Conversely, to remove a column – select the desired column from the Selected fields section, and click X Remove. Use the Up/Down icons to modify the order (left/right) of the selected columns. When satisfied with any format changes, click Update.
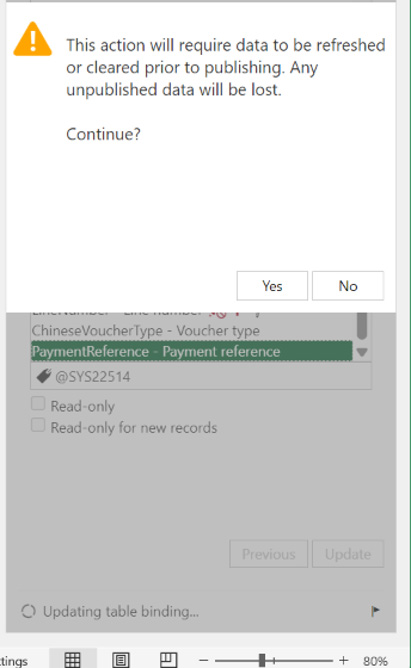
- Click Done, which will prompt for a second refresh. If it does not prompt for a second refresh, you should refresh manually.

- The new column(s) are now added. Save and close the template.
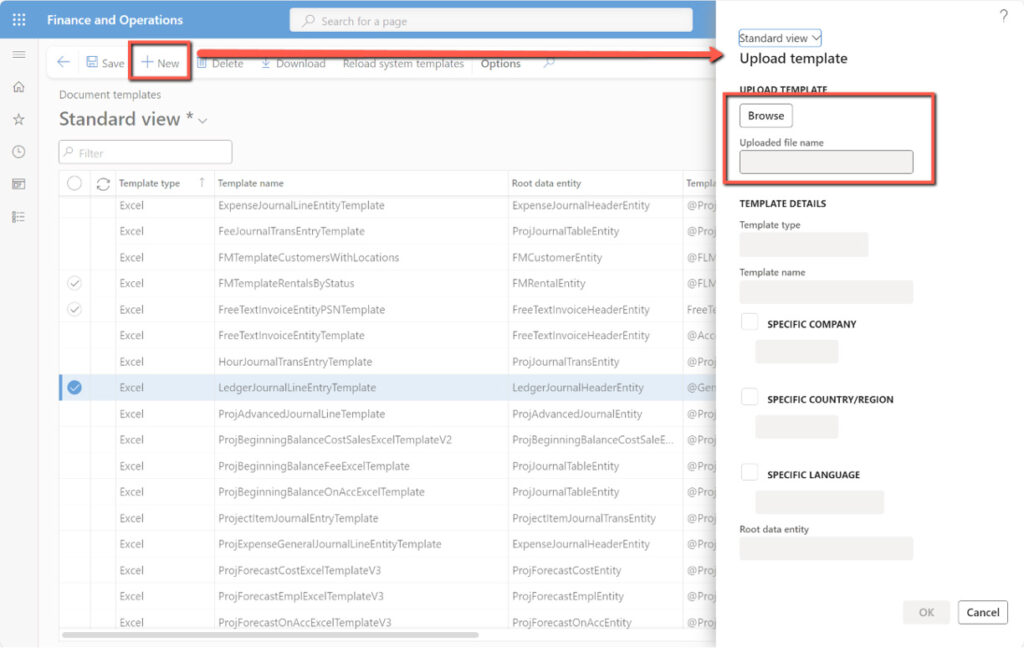
- Return to Common/Common/Office integration/Document templates and click +New.
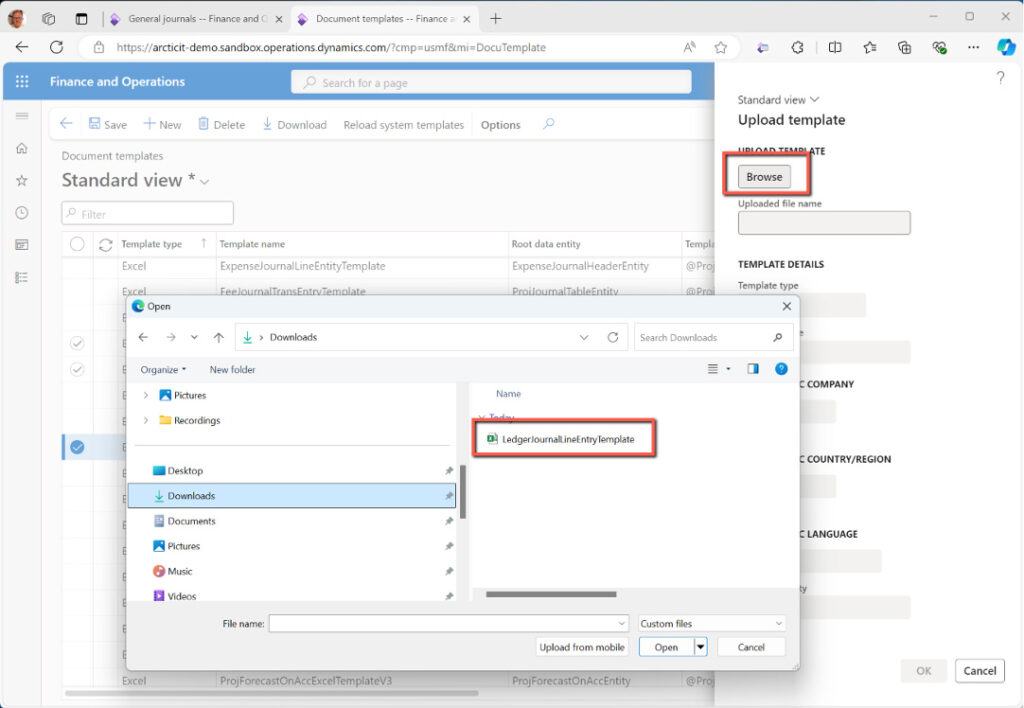
- Browse to the modified template you just saved, select it, and click Open.
- Once the template has uploaded, click OK. You will be asked if you would like to replace the existing template – click Yes.
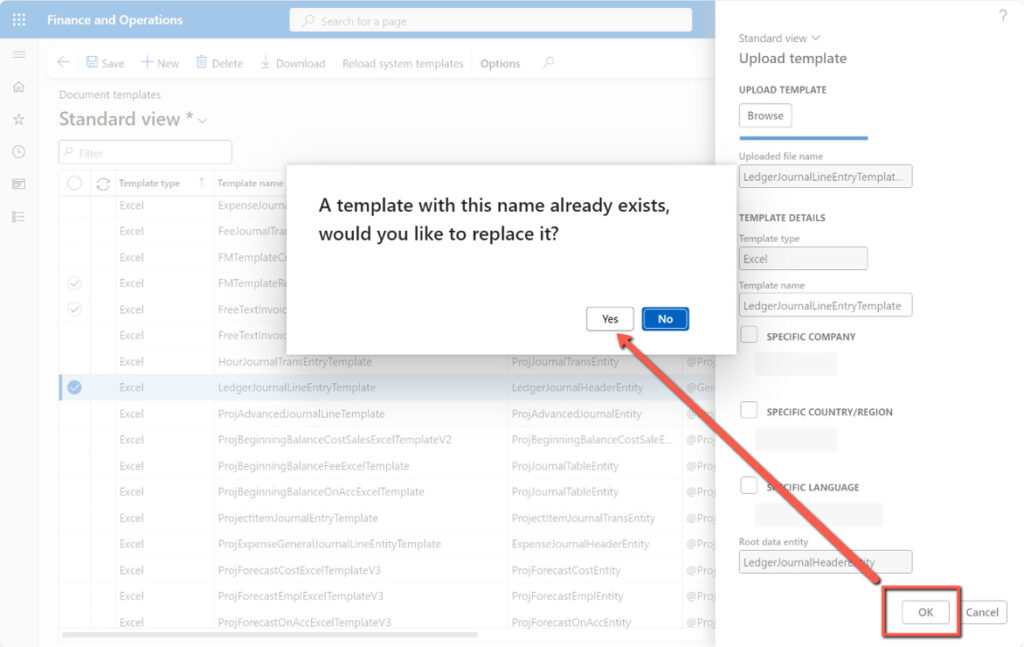
The default template has now been modified.
I hope you found this article helpful as you navigate customizations with the Open-In-Excel templates for Dynamics 365 Finance and Supply Chain Management.
If you’re interested in working with a support partner like Arctic IT who can provide how-to guides like the one discussed in this article, connect with us today. We offer 24/7 U.S.-based support from our dedicated team of experts who are certified in Microsoft Dynamics 365 cloud solutions. We look forward to the opportunity to discuss your needs.

By John Wainwright, Senior Client Services Consultant at Arctic IT

