
The Dynamics 365 Data Import Wizard is a useful tool that comes standard in all versions of Dynamics 365 CRM.
It allows you to import or update large datasets in CRM without the need for third-party applications, connectors, or custom code. In this post, we will discuss how to use this tool, as well as some tips and tricks to help you along the way. The screenshots that follow were taken in the Unified Interface.
The Data Import Wizard can be found under Settings > Data Management > Imports.
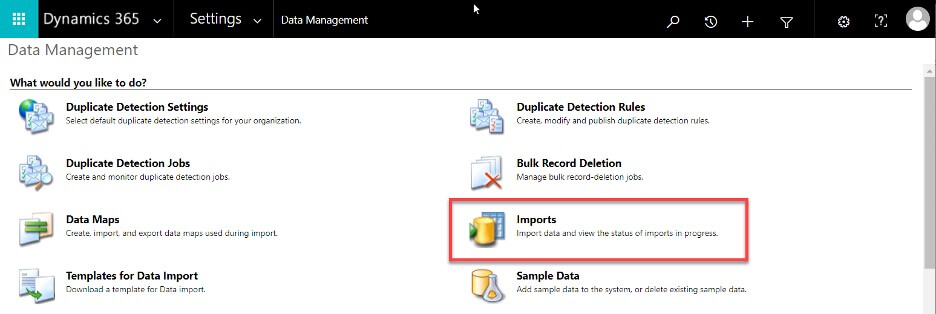
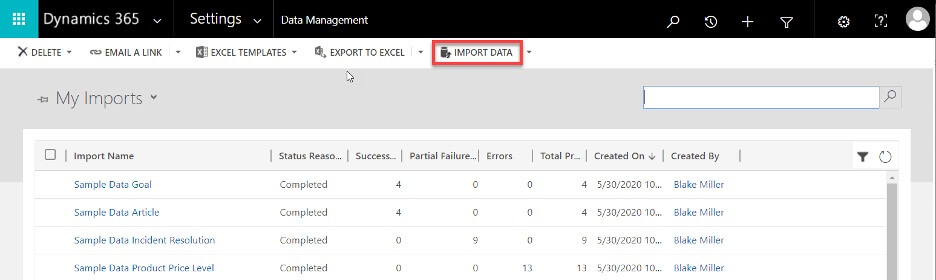
From here, you can import new data sets and manage previous imports.
Source File
To begin the import process, you’ll be prompted to select a data file to upload. This file can be any of the following supported file types: .xml, .csv, .txt, .xlsx, or .zip. A .zip file can be used to import multiple data files simultaneously. If you are importing data from a spreadsheet (.xlsx) that was not originally exported from CRM (more on this later), you’ll need to first convert it to .csv.
Mapping fields
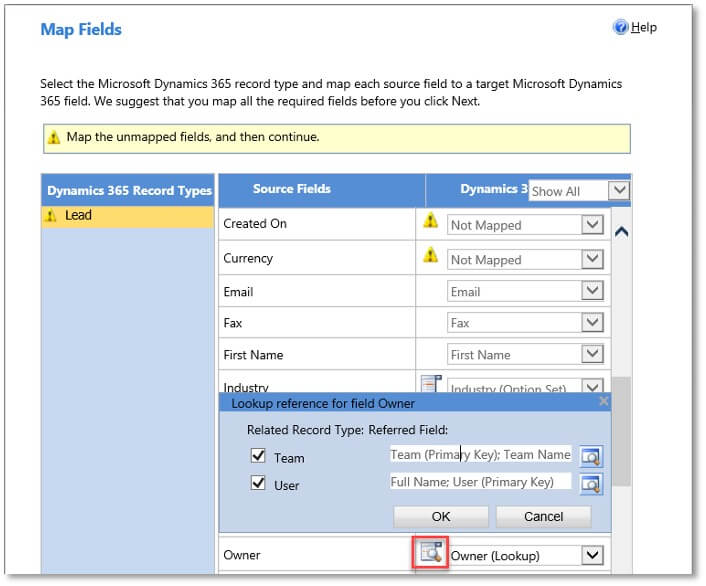
One of the most critical steps in a successful data import is correctly configuring the field mappings. Once you’ve selected a file to import and specified the entity, you’ll be presented with a list of all source fields (columns from the import file) and must specify how each field will transfer into Dynamics 365.
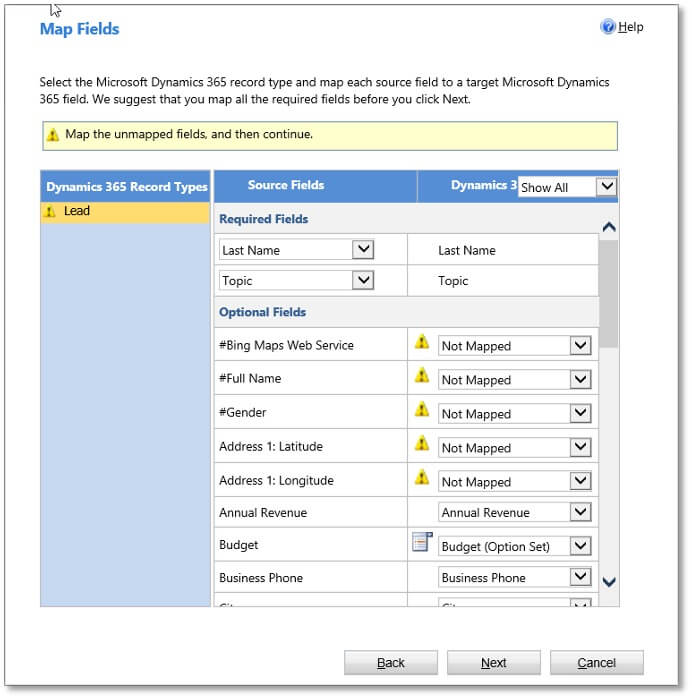
The fields required by that entity in Dynamics 365 will appear at the top of the field mapping page. These fields must be assigned to columns from the source file. The optional fields below may be mapped to an existing field in the system or they can be skipped (“Not Mapped” or “Ignore”).
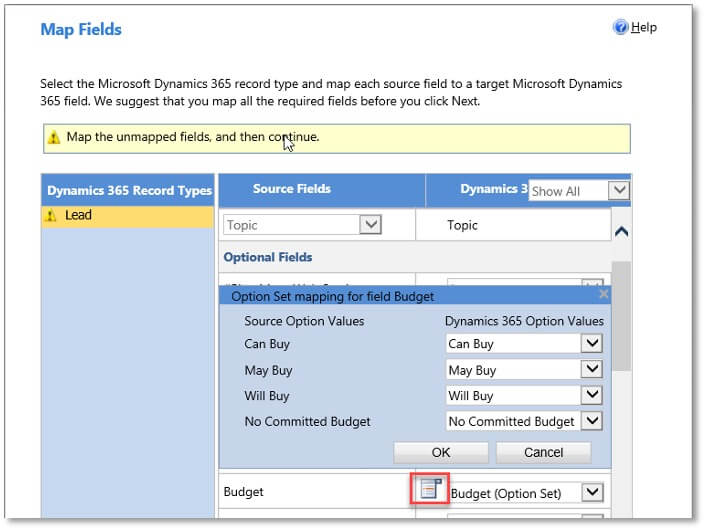
For option set fields, you’ll be asked to map each value from the data file with a value in the system. Any exact matches will be automatically found for you. Any discrepancies will have to be manually assigned.
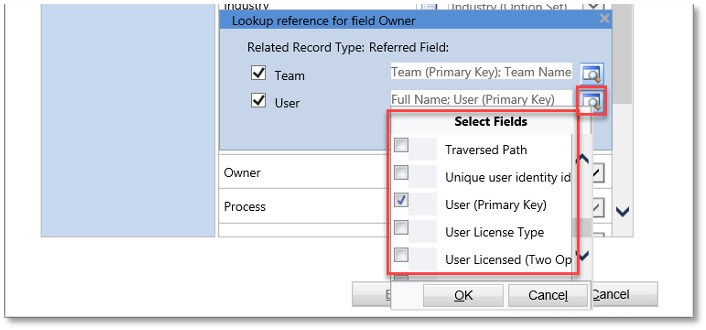
For lookup fields, you can select which entity the lookup is referencing (i.e. team or user for the “Owner” field). Within each entity selected, you will pick which attribute(s) from that entity you want to compare against the value in the source file in order to establish a link. You may select multiple fields to check against multiple different values.
Import order (for multiple entities)
When importing data into multiple entities, you’ll need to consider the order of entities imported. Generally, you’ll want to first import any entities that aren’t dependent on other entities. For example, a contact may be dependent on an account through a many-to-one relationship (an account can have many contacts, but a contact can only be associated with a single account). If the contact is imported before the account, the lookup from the contact to the account will not be able to populate at the time of import because there are no accounts yet in the system. In this scenario, it would make sense to import accounts before contacts.
In situations where two entities are dependent on each other, you may need to import them simultaneously in a .zip file or update those dependent fields after the imports have completed.
Duplicate detection
Depending on the data source, there is the possibility for duplicate records to be created when importing large amounts of data. Dynamics 365 has built-in duplicate detection functionality that can be customized to the desired level of strictness on a field-by-field basis. These are located under Settings > Data Management > Duplicate Detection Rules.
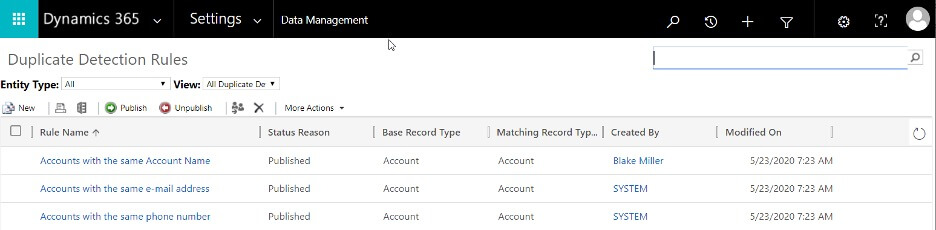
If a record attempting to be imported is caught in the duplicate detection filters, it will not be imported but will be flagged and added to the list of “Failures”.
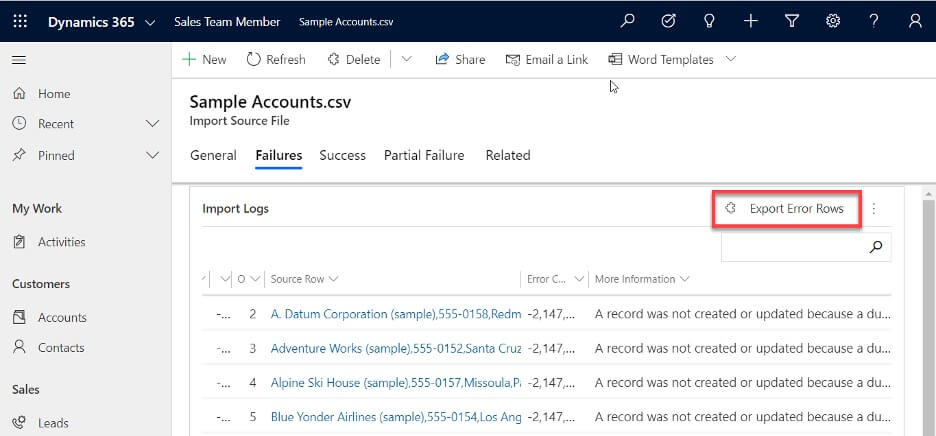
Handling failed rows
Rows may fail to import for several reasons, including unresolved lookups, missing option-set values, incompatible data types, duplicate detection filters, etc. All failed rows will be listed under the “Failures” tab of the import record.
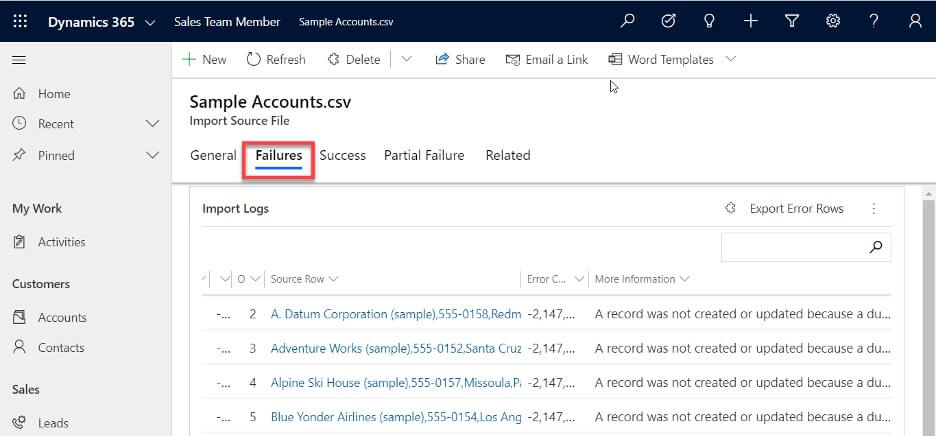
A description of why each row failed will be included. To correct the failed rows, there is an option to “Export Error Rows”. This will export a new .csv with just the failed rows. You may then adjust them as needed then resubmit them for import.
Reverting import
It is possible to remove all records from a given import with just a few clicks. Maybe you realized that the data you imported was mapped incorrectly or you were just testing the import process but don’t need to keep the data in the system. To revert an import, open the import record, select the dropdown next to the “Delete” button, and click “Delete Imported Records”.
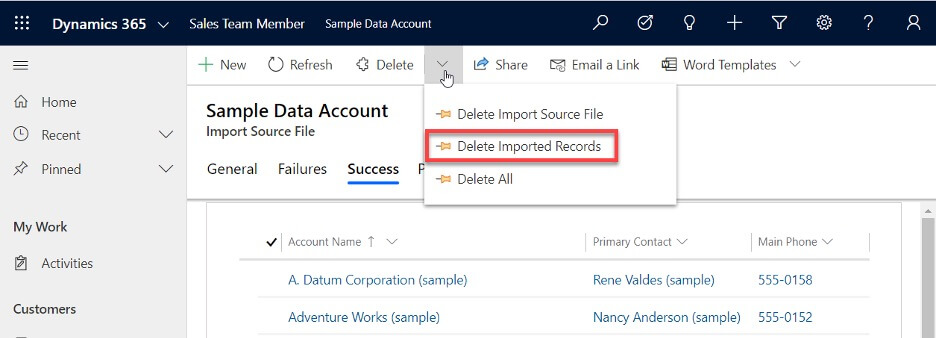
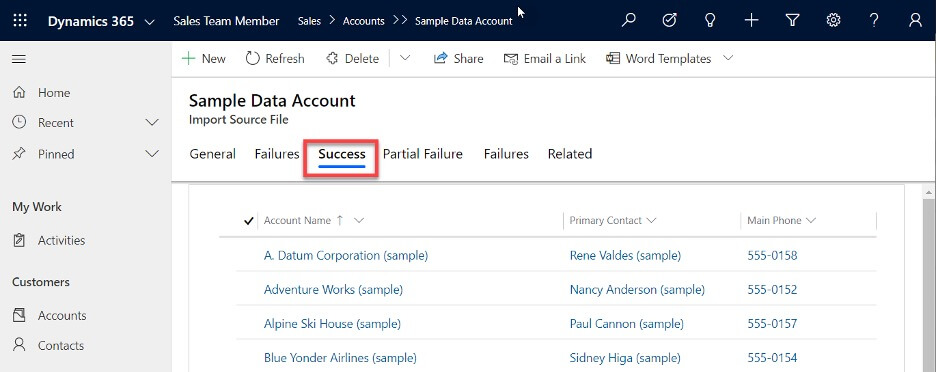
This will remove all records that were imported during the current job. You can also navigate to the “Success” tab to view all created records.
Data import templates
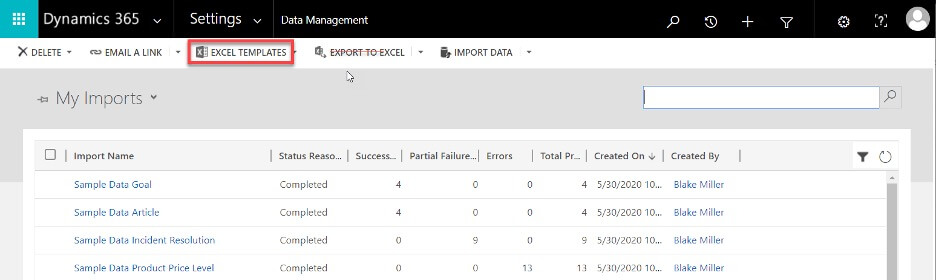
To aid in assembling a data file for import into the system, Dynamics 365 has the ability to produce import templates (.xlsx). These templates will give you a blank spreadsheet with the correct column names and formatting, which will greatly simplify the import and mapping processes.
To create a new Excel template, navigate to Settings > Data Management > Imports, then select “EXCEL TEMPLATES” and “Create Excel Template”.
You’ll then be able to select an entity and view that will be used to create the template. This will determine which columns appear in your template.
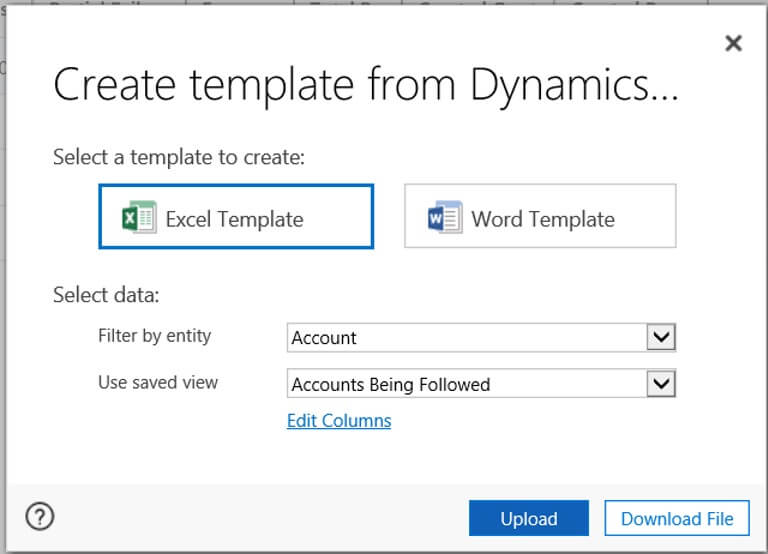
You can also do this from a view itself by selecting “Excel Templates” and “Upload Template.”
Click “Download File” to download the template. Now your template is ready, and you may begin populating it with data. Once your data is in, you can upload it just like any other import file. One small difference is that you can import this as a .xlsx file (you don’t need to convert it to .csv). You’ll notice that the first three columns of the spreadsheet are hidden. These columns are used by the data import tool and should not be manually edited.
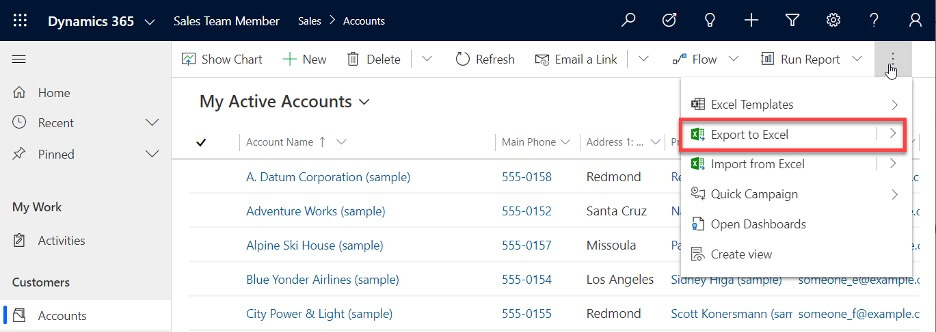
Updating existing data using Excel export and reimport
Another useful function of the Data Import Wizard is that you may upload a view or list that was previously exported from the system, with any changes you made after the initial export. This comes in handy when you need to mass update existing records. To do so, select the desired view in Dynamics 365 and click “EXPORT TO EXCEL”.
This will download a .xlsx file similar to the Excel template discussed previously, except this export will also contain all the record data. This spreadsheet will contain the same three hidden columns as the Excel template, and those columns should not be modified. You may then modify the desired record data within Excel and reimport. The unique keys stored in the hidden columns are what the system will use to match the imported data with the existing records so they are updated accordingly, and no new records will be created.
Alternative data import options
While the Dynamics 365 Data Import Wizard is adequate for simple data migration projects, it will not cover all use cases. If you need an active integration that will sync data regularly, the built-in import tool will not be sufficient. Also, more complex migrations may require greater mapping capabilities (i.e. composite keys) or data transformation, which would require another solution.
There are several alternatives to the Data Import Wizard. Many third-party software vendors have off-the-shelf products that handle data migration. Microsoft also has a few other tools that can assist with more complex migrations, including the Configuration Migration tool and the Package Deployer tool. These are both included in the Dynamics 365 SDK which can be downloaded from Microsoft. Another option is to build custom code that will push data into the system (using a plugin or console application).
While these other options may give you some additional capabilities, the Data Import Wizard is a great starting point for your basic data migration needs. If you’re ready to work with a Microsoft partner who can support you with solutions like the Data Import Wizard, reach out to us today.

By Blake Miller, Senior Solution Consultant at Arctic IT