
Most people don’t realize it, but the only thing standing between you and the automation your business really needs is…you.
Not Microsoft. Not a missing product feature. Not a roadmap.
If you’ve ever hit a wall in Power Automate, Power Apps, Copilot Studio, or Azure Logic Apps because “there’s no connector for that,” it’s time to flip the script. With custom connectors, you don’t have to wait. You can build the bridge yourself, and it’s easier than you might think – especially when you understand how APIs, connector files, and connector operations work together.
The Connector Problem Nobody Talks About
Power Platform and Azure Logic Apps have access to over 1,000 connectors. These integrations let you connect to apps like SharePoint, Outlook, Salesforce, and Slack to automate workflows within your Microsoft apps or flows. That may sound like more than enough, until you need to connect to something that isn’t on the list.
Maybe it’s your homegrown marketing database. Maybe it’s a third-party CRM that’s not “popular” enough to have a native connector. Or, maybe it’s an internal API you control but can’t touch inside your flows.
When there’s no native connector, teams often stall. They delay the project, look for workarounds, or worse – hire someone to manually copy and paste data between systems.
The good news: custom connectors remove that bottleneck entirely.
What Custom Connectors Actually Do
Custom connectors are your ticket to integrating any API into Power Platform. They are build-your-own connectors that let you bring your own APIs into Power Automate, Logic Apps, Power Apps, and even Copilot Studio.
They work just like prebuilt connectors, so you can use them as triggers (“when this happens”) or actions (“do this now”) inside your flows. Once published, they will show up on your list of available connectors just like any other.
If you have an API endpoint, whether hosted in azure functions, web apps, or another cloud service, you have everything you need to build a connector.
The Custom Connector Lifecycle: Build to Use
Here’s the high-level process for building a custom connector:
- Start with your API. You can use an existing one or build your own using tools like Azure Functions, Azure Web Apps, Azure API Apps, or whatever you’re comfortable with.
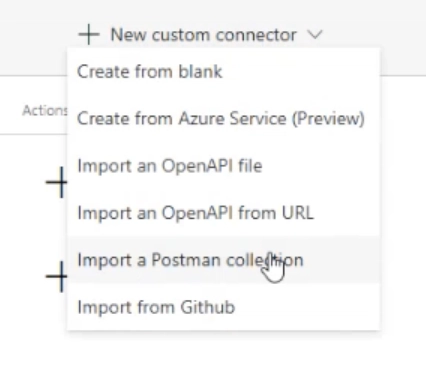
- Navigate to “Custom connectors” within the Power Platform interface and click on “+ New custom connector”.
- Select an import option from the dropdown list provided. You can use a Postman Collection (strongly recommended) or an OpenAPI Specification (OAS) file to describe what your API does.
- Postman is an application used by developers to create and test APIs. A Postman Collection is a collection of requests for an API (or multiple APIs).
- OAS (formerly known as the Swagger Specification) is a document that defines an API’s capabilities, so that developers and computers can understand a service’s capabilities without having the source code. Most organizations that use these files have one available for customers of their products.
- The GitHub option was recently added to this list.
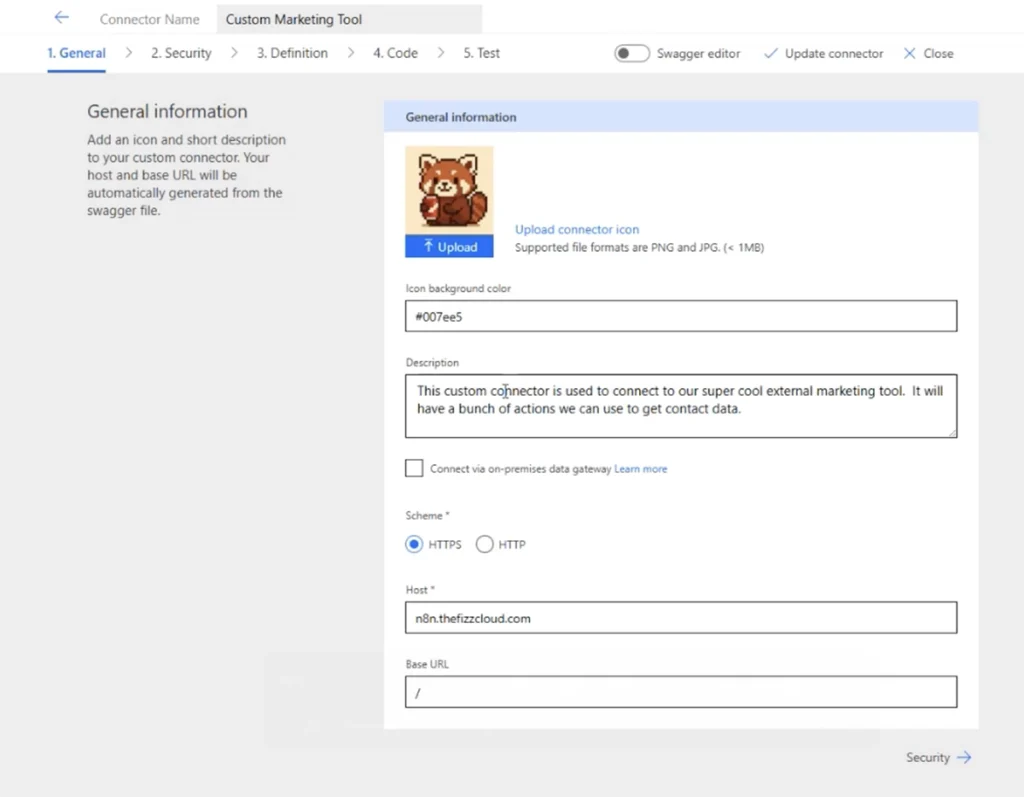
- Outline the general information. Define the name, description, scheme, host, and more using the fields provided. You can even upload a connector icon to further personalize your custom connector.
- Secure it. Choose your authentication method (Microsoft Entra ID, OAuth 2.0, API key, basic auth). Entra ID is Microsoft’s recommendation. Security is non-negotiable. If your API doesn’t have authentication, I strongly recommend implementing it prior to moving forward…

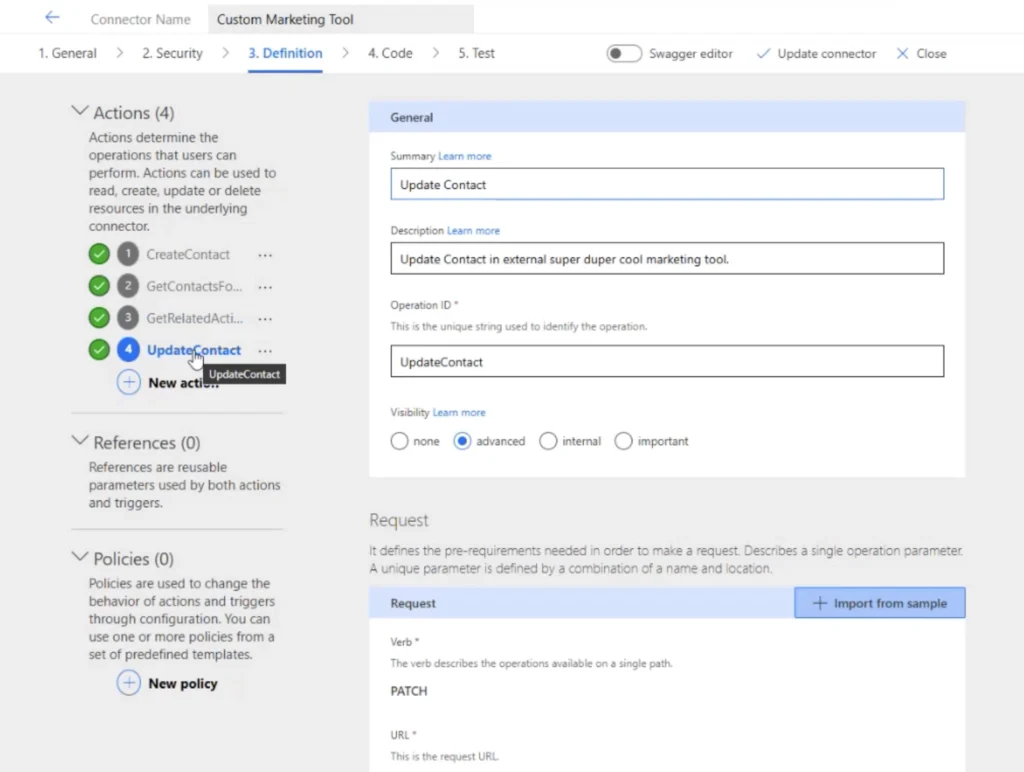
- Create actions or triggers. For example, Dataverse provides a wide variety of actions available to be used as API calls for your connector. You will need to provide a summary and description for each action, then assign a unique name to the action with an Operation ID. Action visibility and pre-requirements needed to make a request are also defined at this step.
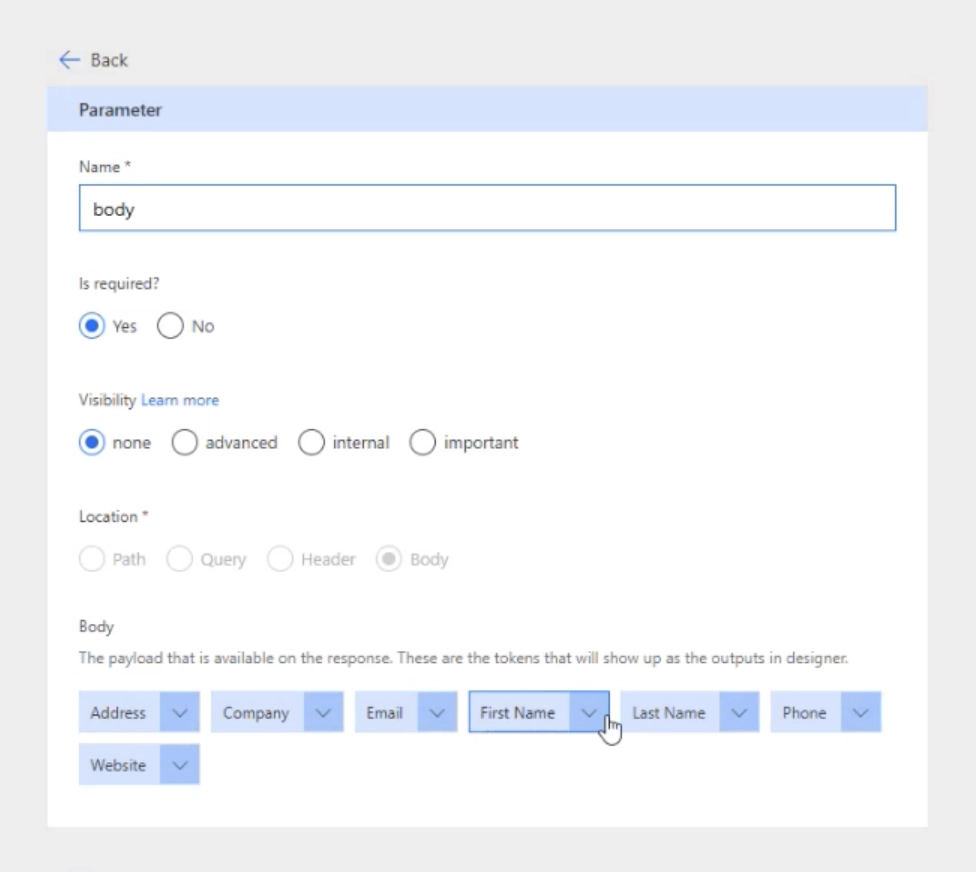
- Map your fields. This part matters: define your fields (tokens) separately within the API, so they look nice and usable inside Power Automate, Power Apps, Copilot Studio, or Logic Apps. A well-labeled dropdown or clear placeholder makes all the difference.
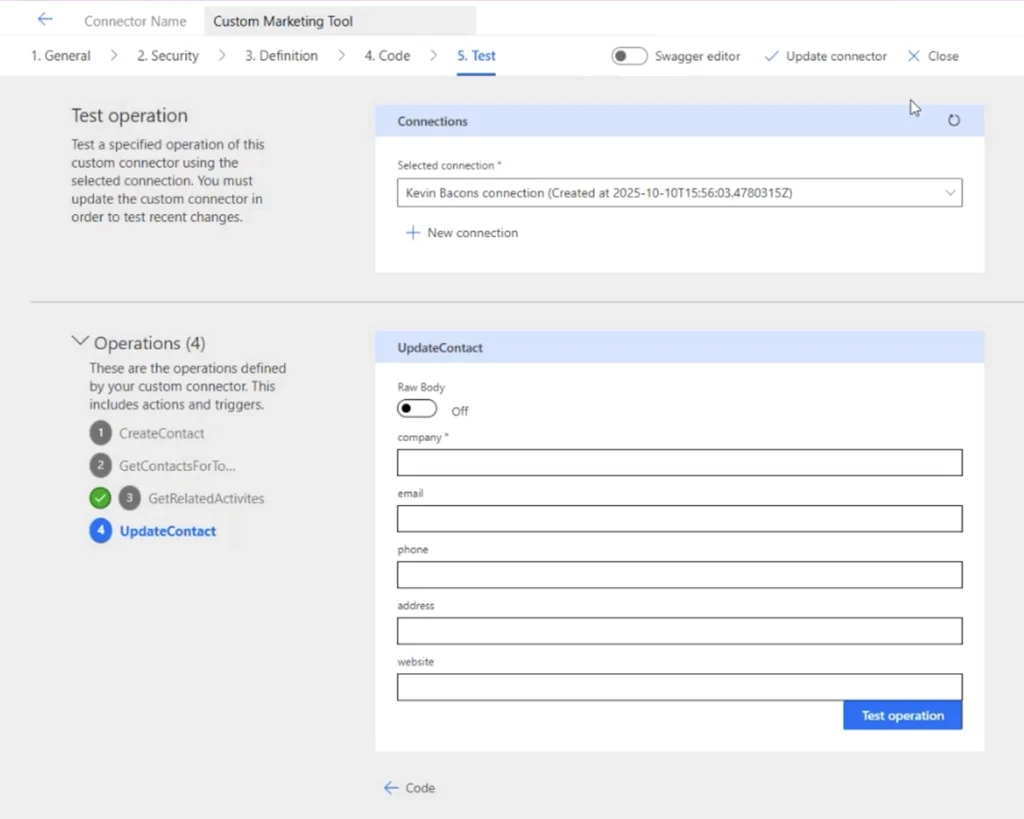
- Test it. Use the built-in tester to make sure your connector works before plugging it into an actual flow.
- Use it. Just like any other connector, you can now add it to flows, apps, and automations. You can share your connector with other users within your organization. You can also share with individual users or groups within your tenant.
A Real-World Example in Power Automate
At Community Summit NA 2025, my colleague Skyler Fitzwater (check out his GitHub page) and I presented a live demo on the creation of a marketing tool custom connector for Power Automate.
In this sample use case, our workflow automation watched for new contacts as they are added in Dynamics 365, pulled the related account data, and pushed that contact into a marketing system via my custom connector. The connector itself was built with actions like “Create Contact,” “Get Today’s Contacts,” and “Update Contact.” Each action provided blank fields ready to be filled in with dynamic content from earlier steps in the flow.
To the end user, a custom connector should feel just like any other connector. Nothing about it screams “custom.” When you do the setup right, it will behave just like a native connector. Once the flow is triggered, the data moves, and the API will update in real-time.
Visibility, Security, and Avoiding Gotchas
As a developer with years of experience building custom connectors, I have seen just about everything. Here’s few lessons you don’t want to learn the hard way:
- Never rename operation IDs. Once set, changing them can break your flows. Plan ahead and stick to them.
- Use visibility settings wisely. Mark actions as “important” if you want them to show up by default in your connector. Otherwise, they might be hidden behind “See more.”
- Secure everything. Custom connectors support standard authentication types, but they rely on you to implement them correctly. Don’t leave your APIs exposed.
- Test thoroughly. Ensure everything is working as expected with your Logic App or Power Automate flow before scaling.
- Postman over Swagger. While both will work, Postman is generally easier to manage – especially for teams testing APIs regularly. Plus, it lets you export test collections directly into the connector builder.
- Connector certification is optional but powerful. Want your connector to be public and used by others? Microsoft has a certification path for that. But it’s also fine to keep it private inside your organization.
Good governance ensures your connectors remain stable, secure, and reusable across the organization.
Conclusion: Custom Connectors = Your Competitive Edge
If you’re waiting for someone to build the perfect connector for your business use case, you’re already behind. The most agile teams are already building their own because it saves time and ensures you get exactly what you need.
You don’t need special privileges. You don’t need deep dev skills. You just need an API, a little guidance, and the willingness to build something once that will save you dozens of hours a month.
Additional resources:
- Custom Connectors on Microsoft Learn: https://learn.microsoft.com/en-us/connectors/custom-connectors/
- Custom Connectors FAQ: https://learn.microsoft.com/en-us/connectors/custom-connectors/faq?source=recommendations
Custom connectors powered by well-designed connector files, efficient connector operations, and scalable backends like Azure Functions give you full control over your automation environment . If you know what you need to build but aren’t ready to do it yourself, we can help.
Arctic IT’s certified consultants can assist you in designing and building custom connectors for all your Power Platform or Azure Logic Apps needs. Connect with us today to get the conversation started.

By Carey Buchanan, Senior Application Developer at Arctic IT